Showing posts with label tutorial. Show all posts

Wednesday, October 2, 2013

Cheeks


Beginner's Series Part Two:
Cheeks Tutorial!


We can't all have cheekbones like Angelina Jolie or Kate Moss (don't I freaking wish), so those of us that want them without cosmetic surgery have to improvise! All pictures are under the cut.

This is just the tutorial version. All breakdowns of products and such will come shortly.

Step 1: Sweep a bronzer of your choice in the hollow of your cheeks, in something of a triangle shape, with the base of the triangle at the outer perimeter of your face, and the tip of the triangle pointing towards your mouth
Step 2 & 3: Sweep a blush across your cheekbone, and then a highlighter across the top of your cheekbone

Step 4: Blend it out! Grab a large powder or stippling brush and buff out the colors until they don't have a stark contrast against each other and your skin.

You're done!

Again, pictures under the cut.

Hope you liked it, 
Love,
Cera


Tuesday, September 3, 2013

The Best Acne Treatment!

Anyone out there that is reading this that suffers from acne knows, whether it be a spot here or there, or a full on war is being waged on your skin, that sometimes it feels like there's no way out. We go through hundreds of dollars (maybe even thousands, yikes at the prices of some higher end acne solutions!), hours of time, and many frustrating breakouts in search of the ultimate cure. The most frustrating part, for me, is that the best treatment so far for me is in my own kitchen!

I started this treatment 4 days ago and have noticed 50% less breakouts. I have sensitive, easily irritated skin. I didn't change my diet, exercise, or any other routine aside from the products I'm using.

Interested yet?

Well, my holy grail acne treatment is....

Honey and Sea Salt 

This treatment is 1 teaspoon and 1/4 sea salt. My sea salt grinder is adjustable, so I like to include both smaller and larger salt grains, just make sure that they aren't particularly sharp! You don't want to scratch your face!

So, what? Still not sold? It's just a regular exfoliant that smells good, you say? What exactly is it doing to combat acne? I can't blame you for being skeptical. Really, I've been there. But, after copious research and the ol' try it yourself method, I've come up with some serious reasons as to why this scrub is for ALL skin types. Yeah, you read correctly. ALL OF THEM. Oily, dry, acne prone, sensitive, combination, and even more mature skin types. 

Reasons Why Honey Rocks:
  • contains antioxidants
  • antifungal
  • antibacterial
  • calms inflammation
  • draws impurities from the skin
  • ultra hydrating
  • smells AMAZING
Okay, so you get honey. That might be worth slathering all over my face, you say. But what about salt? What's so good about salt?


Reasons Why Sea Salt Rocks:
  • exfoliates
  • absorbs toxins from skin
  • during the manufacturing process, sea water is evaporated, leaving the salt and lots of minerals behind, so it's like you're slathering minerals all over your face
  • fights infection

Do I really even need to say more?
This stuff is awesome. 

Have you ever tried it? Are you going to try it now? Let me know in the comments if you have, and what your experiences are!

Cera


Thursday, August 29, 2013

Tutorial: Shimmery Rose Gold Smokey Eye

Hey guys, today I bring you a tutorial on achieving a Rose Gold Smokey Eye look, and it's one of my favorite eye looks to do, as it has the drama and visual appeal of a smokey eye while softening the look up with a gorgeous metallic twist. Le'ts get right to it!


Step One:  Make sure your eyes and face are clean and free of debris, oils, and leftover makeup.  In this photo I've just cleaned my face and applied foundation to the area around my eyes, below my eyes, and my eyelid.


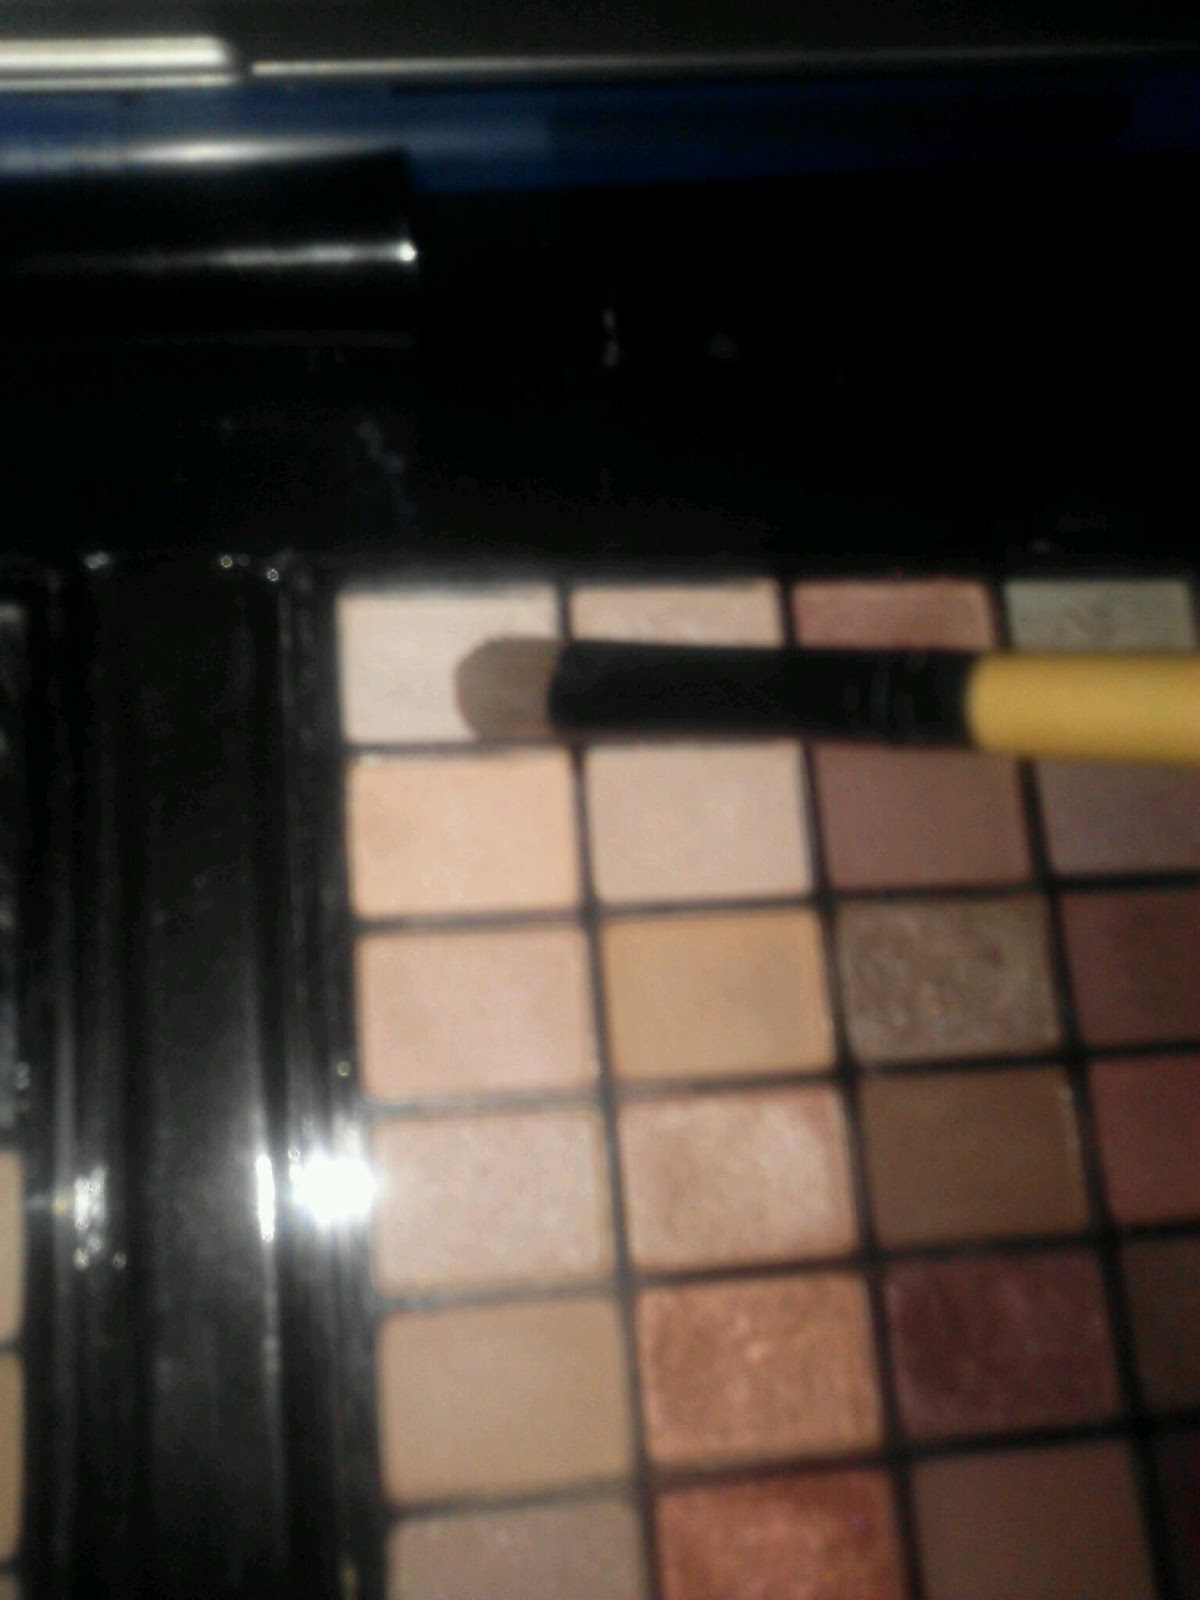
Step Two: Prime. If you want this look to last all day or night, a primer is the best way to do it. I'm using e.l.f.'s essential eye primer in pearl, but you can use any other primer, or a concealer of your choice that you know isn't oily and will keep the shadows all day.


Step Three: Now that the eyes are primed, I'm taking a matte light pink and sweeping it all over the lid and up to the brow bone. The color almost looks white but is a very light pink. This sticks to the primer and acts as a matte base for the other shadows, as the primer (although not recognized by the camera) is very sparkly. Also here, I've filled in my brows but I'm not going to describe how I've done so, as I have an extensive brow tutorial on the way.

Step Four: Now I'm taking a gold shadow and packing it onto the lid, up to the crease. 

Step Five: To create the "rose" part of the rose gold look, I'm sweeping a medium pink over the gold that I've just applied.

Step Six: To add definition to the eyes, I'm taking a dark pink and then a coppery medium brown, and applying them respectively, the brown slightly lower than the pink. I'm using a windshield wiper motion to apply these to the crease.

Step Seven: To smoke out the look, and keep the lines between the crease color and the highlight shade from looking too harsh, I'm taking a light pink just above my crease color (the dark pink) and blending it between that and the matte baby pink.

Step Eight: Next I'm going to open up my eyes by adding a very light shimmery gold color to the inside corners of the eyelid.

Step Nine: Now to Balance the top and bottom of my eyes, I'm applying the dark pink to the lower lashline, relative to the length of my lower lashes, going from the outside corner to about the middle. Then I'm taking the light gold to the bottom lashline in the inner corner, connecting it to the inner corner of my top lid.

Step Ten: To add to the drama, I'm taking a black eyeliner, and lining my lower and upper waterline, and then I'm going to smudge it along the top lashline, not adding too much, but just enough to thicken up the base of my lashes.

Step Eleven: Now I'm taking my favorite mascara and simply applying that to the top and bottom lashes.

Step Twelve: I'm now sweeping a soft pink blush along my cheekbones, not using a highlighter because the blush has golden tones to it, and then contouring my cheekbones with a bronzer for added definition.


Here's the completed look! I've decided to leave my lips bare, aside from a lip balm, just because I wanted to keep the focus on my eyes. Ignore all the craziness in the background, I swear I'll get better at taking pictures!

Cera

Monday, August 26, 2013

Welcome All!

Hey!

Welcome to my beauty blog, where I'll be posting blogs about all things beauty. So far I have reviews, makeup tutorials, diy skin and haircare tutorials, and comparisons planned, and I'm really excited to carry this out!

See you soon,
Cera